Thursday, August 25, 2016

Picture Frames: Updated

A few years back, I found a site that occasionally had a really good deal on canvas prints. The only downside was that they were unstretched and just shipped rolled up. To have someone stretch it can cost up to $50-100, so I decided to learn how to do it myself.

Having limited tools and space (living in a two-bedroom apartment with no garage), I bought a miter saw box and through a lot of trial and error, eventually figured out how to build the stretcher bars, stretch the canvas, and even how to make a floating frame that would still show off the image that was wrapped around the side of the stretcher bars (called a gallery wrap).

Over the years, I did about six of these, for our own home and for family. Earlier this year, there was another deal on canvas prints, and I decided to offer my services at cost to family. The deal extended all the way up to very large 20x30 prints (my previous max was 18x24). I ended up ordering six canvases.

Over the course of several weeks, I measured, cut, glued, stretched, stapled, stained, and mounted the canvases.
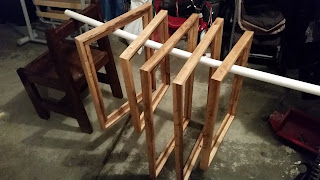
Frames after the first coat of stain
First stretched canvas
Here are the finished products - please ignore the bathtub in the background - the bathroom has the best light. The last one is the one I did for our family.


Wednesday, August 24, 2016

Companion to Sewing Table

When putting away everything in her new sewing table/desk, Kristen realized that she had a lot of spools of thread. So what did I do? I made her a spool organizer, of course. It was actually pretty easy.

I bought a square of 1/4-inch plywood, then cut it down to fit half of the desk drawer - about 9x13. Then after modeling it briefly on the computer, I measured out 48 squares (8x6) and drew them on the back of the board, then measured the center points of each one and drilled holes through them.


I then cut some wood dowels into 2 1/4-inch pieces, put some glue on the ends of each piece, and used a rubber mallet to hammer them in place.


After they dried, I very carefully sanded the back to make it flush, and filled in any chunks I blasted out when I drilled through the board too quickly.


Ta da! Spool board. I also finished stripping and staining the chair that came with the desk. I'll post that photo soon.

Tuesday, August 23, 2016

Kids Area

This post was going to be a little heavy on the words, but I decided instead to do more of a visual blog post, so take a look at this picture. I also included the non-labeled photo, in case you want to see it that way.