Sunday, August 5, 2018

The Doors

This is what our doors used to look like. Flat, golden oak color, dark brass door knobs, shiny brass hinges. I knew when we moved in almost three years ago, this was something I was going to change. I have always felt that panel doors look so much better than flat doors.

Our front door and our garage door were already both 6-panel doors, so I thought it best to stick to that scheme (I think I would have picked them anyway - they're classic). I toyed around with the idea of buying solid-core doors, at least for the bedrooms (to help reduce noise), but ultimately just went with hollow core panel doors throughout (much cheaper).

Fit jig over door and tighten it down, then route out the hinge
Depth gauge
Now, I'd heard that if you don't buy pre-hung doors, it can be difficult to get new doors to fit just right in old frames. So to help me with my endeavor, I purchased a couple of jigs. One, from Ryobi, to do the hinges. And one, from Irwin, to do the door locks / handles. The Ryobi tool was fantastic - it takes out all the guesswork. It comes with a router bit and a built-in depth gauge for it, and has positive stops to adjust the template for different-sized hinges. It also is able to do both rounded and square hinges (those rounded bits are removable inserts). All I did was line up the door I'd removed with the new door, drew some lines with a square to match them up, then used the router template to mortise out perfect slots for the new hinges. That made it super easy to do the hinges. 

Irwin tool with hole saws
The Irwin tool wasn't as good as the Ryobi. I did the same thing: lining up the old and new doors and drawing lines, then attaching the jig. This one has two holes where you screw in the door lock screws to hold it in place. Then you use the included hole saws to cut the door handle space (starting the hole on both sides so you don't blow out the other side), then the door lock hole. The biggest issue was that the jig didn't stay put very well. To keep the holes lined up, punch the center drill bit through, then switch to the other side and ignore the jig, using the center hole as your guide instead. And having a drill bit that switches between the two hole saws isn't ideal, as those things can be difficult to separate from the hole saw. But the biggest issue was the plastic template that was included to cut out a space for the bolt plate. The router bit got so heated up in cutting the space, that it melted the plastic jig. I had to be really careful I didn't go outside where the original lines had been.

By the way, here's what happens if you screw up in measuring, and measure from the wrong end of the door. You accidentally drill the door handle hole in the wrong spot. This was a $31 mistake.


After I got a few doors on, I realized that my doors were slightly too wide, when compared to my original doors. So I pulled them off and planed them down slightly with a hand planer, then sanded them smooth. This was something I had to do even later on, when a couple of the doors started sticking (I ended up planing those in place, though).

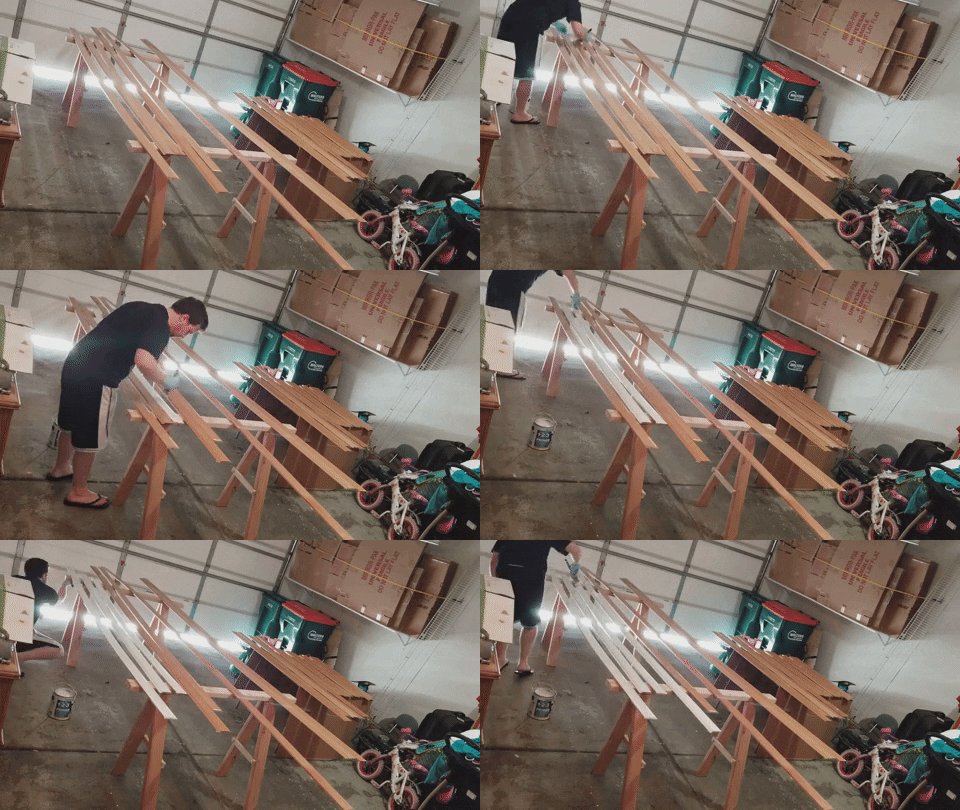
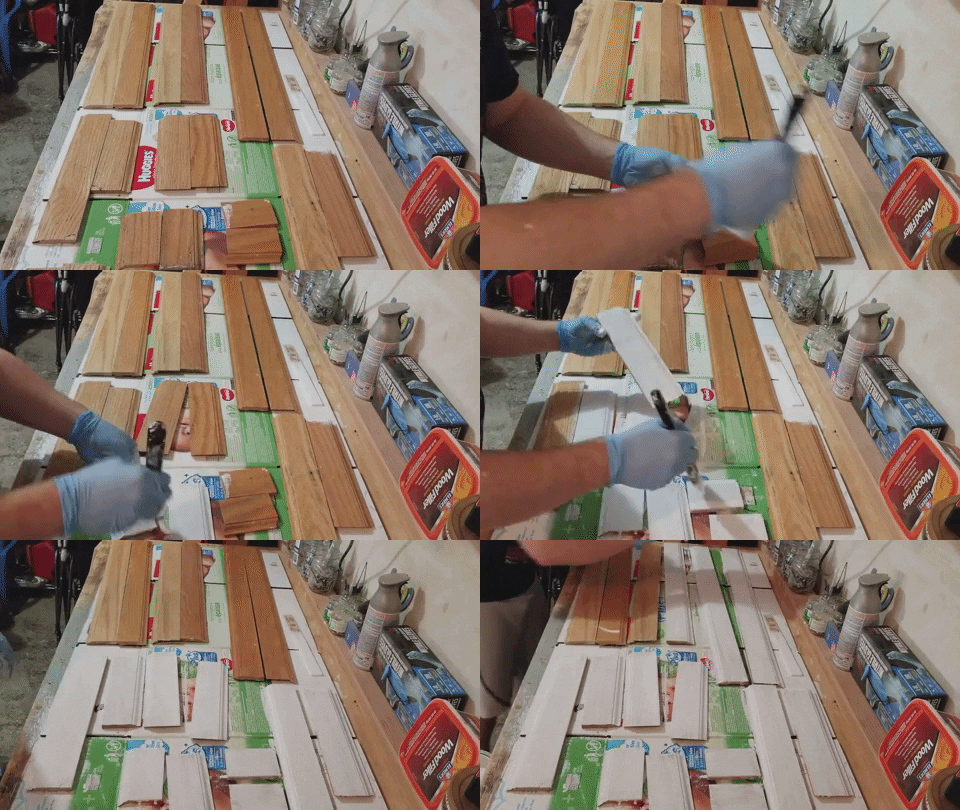
I also tried painting the doors in place - not a great idea. It took too long and I had to tape everything, etc. So instead I took them off and painted them in the garage (though I did the shiny topcoats while they hung). I wanted to do something different than just white doors, and felt matching the doors to the other woodwork I've done in the house would look pretty good.


I used two coats of General Finishes brand milk paint. The Dark Chocolate color matches their Java Gel Stain, which I used on the cabinets and banister. Then I added a couple coats of Minwax Fast Drying Polyurethane Satin Finish for a topcoat. 

For the hardware, I replaced the door knobs with satin nickel handles, and added matching hinges. 

Here are some shots of the final products! I am really pleased with how they turned out.

Upstairs bedrooms/bathroom

Front door/garage/half bath
Half bath to the laundry room
Upstairs toy room


Sunday, April 22, 2018

Banister

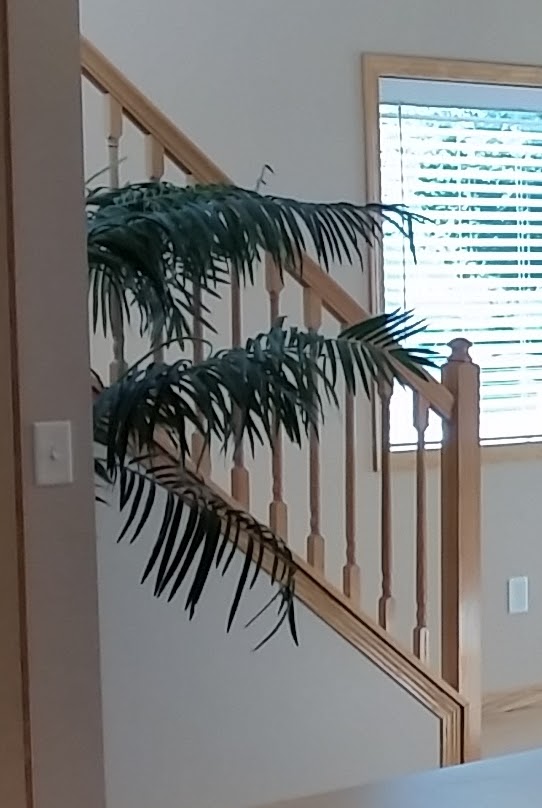
I am on a quest to eliminate all golden oak coloring from my home. The next item on my list was my banister. I used the same process I used on my cabinets: sand, java gel stain, and polyurethane topcoat. This took a while to sand because of all the individual posts with all their little grooves. But I finally did it. Here are the before pictures (notice the change I made in the baseboard on the stairs from this post).


And the after:

Saturday, April 21, 2018

Painting the Walls

Next we moved on to the walls. Well, let me rephrase that. We actually painted the spare room (now the baby's room) and the big girls' room last year. In fact, we painted the trim in those rooms too and used the wrong paint, so we will need to go back over them in the future. Not to mention that we will also need to paint the trim and walls in the office too. Here are the before and after of their rooms:
Panorama of the Girls' Room when we moved in
Much lighter blue with white trim (and bed)

Funky brown accent wall in baby's room before
I researched the crap out of making the painting process easier. I patched walls like crazy, textured them, primed them, and THEN we painted. By the way, priming the patched spots is really important, because it keeps you from getting those flat-looking spots that look like a different color.


We edged around the ceiling in each room first, which I did by hand with a brush (often on a very tall ladder), then rolled the walls while the line around the ceiling was still fresh. To roll the two-story walls, I had to use a very long extension pole. We painted the upstairs living room and hallway, entryway, kitchen, and dining room gray (which ended up looking a little bluish-gray in the light), and are very happy with how it turned out. Here are a few pictures of that.


I keep taking on huge projects - hopefully my next ones will be a little smaller. But the difference is amazing. I love the new white trim, especially with the newly painted walls.

Friday, April 20, 2018

The Trim!

If there are two things I really don't like doing in regard to housework, it's sanding and painting. Guess what the majority of my house projects have been this past year or so? Yep. Sanding and painting. But this time, I tried a different approach. I now have an air compressor and a brad nailer/stapler, so I decided to take all the trim off and sand/paint it, then reattach it later.

It actually has been a relatively simple process (just time consuming). As usual, I watched a bunch of YouTube videos on the subject, then went to work. I bought an inexpensive pry bar from Menards (local hardware store chain), and while we were watching TV one night, went around the room, prying off baseboards and removing nails.

The trick is to first get your bar under the trim and lift up - that will pull the trim away from the wall enough to slide the flat end in there. Then you push it down as far as possible, and rock the bar back and forth gently. If it is getting stuck on the carpet, put the bar back under the bottom of the trim and push it up.

I like to use the curved end once it fits, because it seems like it is better for pushing out the bottom portion of the baseboard. Then I removed the nails from the boards and the walls. There are a couple holes on the pry bar that make for perfect spots to brace the pliers when you pull out the nails.

Anyway, once those were all removed, I replaced them until I was ready to paint. The baseboards were actually relatively simple. The hard part was all the door and window frames I didn't remove. I figured out that there are exactly 26 window/door frames in my house. I decided that I hated painting, and wanted to come up with a better way to do it.

Turns out, there is a great product called Bulls Eye 1-2-3 primer. It says you don't need to sand or degloss at all, but I still lightly sanded any big bumps away. Let me tell you, it sticks great. I did two coats of primer (only need to dry an hour between coats) with a brush, then a coat of enamel semi-gloss (and another light coat for touch-up) using a roller that I used like a squeegee to help avoid brush marks (the paint said not to thin it). With the second batch of trim, I actually used a paint conditioner, which I think helped get a better finish.


After I finished most of the frames, I moved the baseboards into the garage piece by piece, marking the backs so I would remember where to replace them when I was done, then going through the same painting process as the frames. It's much easier to paint a horizontal surface, by the way. I wish I was spraying it on, but it still went okay.


After I got everything painted, I took it back inside and matched it up on the correct walls. I sanded or cut off any drips on the sides/backs so everything would line up properly, and went about reattaching it to the walls with 18-gauge brad nails. It took a few times of messing up to get the right pressure and technique on the nailer so I didn't have to pound in tiny nails with a hammer and nailset tool.

After
Before
One thing that was weird was that along the stairwell, there was a piece of (different) trim all along it. I didn't think anything of it before, but after I removed it, I wondered why they had done it that way. It looked bizarre, and it wasn't the same as the other side of the banister (stair-side). So instead of putting it back, I replaced it with some shoe rail. I'm planning on staining it the same color as the banister (same as the cabinets).

Baseboards don't line up with the floor
The house originally had carpet in the downstairs living room / dining room, but was replaced with hard floor at some point, so this was a good opportunity to lower the baseboards to match the floor. Then it was a matter of carefully caulking top (and bottom for the hard floor), allowing extra time to mess up of course, filling and sanding nail holes, then touch up painting everything.

Painted baseboard caulked along the floor
This post probably seems really long, but trust me - doing this trim took longer. I legitimately took a year to do this. I would do 2-3 door frames one weekend, then nothing on it for a while, then more door frames, then a window, then I took off part of the trim, then painted it, then more trim, then painted, etc. etc. If I ever do this again, I will take everything (including door frames) off the walls and spray them. I will not hand paint anything except for touching up.

Monday, April 9, 2018

Random: Collar Hack

I am required to wear business casual attire to work. Typically, that means a collared, button-down shirt and slacks (though sometimes it's a polo). I like to look nice, so of course I wear clean, ironed shirts, but the collars always bugged me. I don't like button-down collars, but I also don't like my collar spread across my shoulders like I'm John Travolta in Saturday Night Fever.


So I learned a trick from a friend, about how to get a buttoned-down collar look, without having a button-down collar. Here it is:


This is a stainless steel collar stay, paired with a very small neodymium magnet. I bought a big pack of these collar stays online for a few bucks, and some magnets from Michaels (or Hobby Lobby, can't remember). The trick is to swap out your collar stays for these, and use a magnet inside your shirt to "pin" your collar to your shirt where you want it. That way, my collar always stays where I want it to. Enjoy!


Wednesday, December 6, 2017

#MeToo - #HowIWillChange

I used to write more of my thoughts on this blog. It was the place I came to in order to truly express how I feel. It was truly like an online journal. But as I've grown older, I have become more cautious of what I say, where I say it, and to whom I say it. The internet has grown into a place of oversharing and trolling - somehow, the perceived anonymity of a screen seems to give everyone free reign to dump all of their thoughts and feelings out there, often disregarding tact and other social niceties. In addition, I feel (as many do) somewhat of a desire to project a certain persona and maintain my "personal brand." Quite often you see people's education or careers put in jeopardy based on things that were published online, so there is a desire to protect oneself from potential ramifications to education, career, and relationships.

As a result, I find I am less willing to put myself out there, to share more of my thoughts and feelings. I'm not sure if that is a result of what I mentioned above, or if it is just a side-effect of getting older. Either way, I am much more cautious of what I say and how I say it.

But today, Time Magazine posted their 2017 Person of the Year article, and I need to talk about it. If you have not read it yet, you can probably guess by the title of my post, it is not one person, but those whom Time calls "The Silence Breakers." Those who sparked the recent #MeToo movement, and broke open the floodgates of sexual harassment and assault stories.


It is sad and scary to realize how many stories there are. To realize how many women have felt and continue to feel victimized by men. To hear friends and colleagues put themselves out there and share their deeply personal stories on social media. And to realize that there are more stories left unsaid, because many are still too scared to share. They fear backlash, retaliation, and criticism if they share their personal experiences.

I am a father of three little girls, and every day they are in this world, I see more and more of what they are up against. It should not have taken having three daughters, and a whole online movement, to make me realize my complicity in perpetuating a culture of sexual harassment, abuse, and discrimination against women. As men, collectively, we need to change the narrative.

In response the the #MeToo movement, Australian journalist Benjamin Law suggested a new hashtag, to allow men to publicly share their commitment to ending the culture of sexual harassment, abuse, and discrimination: #HowIWillChange.


I hope that nothing I have done has ever made a woman think #MeToo. But I have laughed, or (more recently) awkwardly nodded and smiled when people tell sexist jokes, I have interrupted female colleagues in a meeting and not male colleagues, I have "mansplained" something while assuming I had the superior knowledge, and in general I have tolerated sexist talk from others. No more. I will speak up and be straightforward. I will listen more and talk less. I will take Sheryl Sandberg's advice from her book Lean In, and be an advocate for women in the workplace. I will give my daughters a good example of the type of man they should expect to be around, so that they refuse to tolerate bad behavior. In short, I will do everything I can so that no one will ever think back on an experience with me and need to say, #MeToo.

Friday, November 10, 2017

Lighting Final (3 of 3)

With the exception of buying new dome lights and replacing them (which will take about 5 minutes per light), we are done with lighting changes. Finally. First off, if you haven't seen my other lighting posts, check out number 1 and number 2.

In my last post, I posted about the chandelier, as well as painting one of our fans. So first off, I finished the second fan. The first two times I painted light fixtures, I left them up on the ceiling, then just taped off around them. Spray paint fumes aren't fun, though, so after the success of my chandelier wiring (see post 2), I decided to unwire the fixtures and take them outside to spray paint. That went much more smoothly (though a bit difficult getting the fan back up on the ceiling - the wiring part was easy - the actual mounting proved a bit tricky). Here are the before and after of fan #2.


Next, I decided to tackle the bathroom lighting. As I mentioned in post #1, we had that Hollywood lighting in all our bathrooms, and I was looking for something nicer. So I purchased Hampton Bay Andenne light bars, via eBay and Amazon. As with most things you buy from sources like that, there were a few hiccups and a couple trips to Lowe's for additional parts. The half bath and the upstairs bath were both fairly straightforward. Turn off electricity, remove bulbs, pull out bulb holders, pull off face plate, then unscrew mounting plate from junction box, unwire light.

Then do it in reverse. Install mounting plate (though that was actually trickier than expected - I had to get creative with how I connected it - in the end, I bought different mounting plates than were supplied with the lights), wire light to wires in wall (also tricky with one of the lights which, turns out, was missing a wire - dang eBay) - black to black, white to white, ground to ground. Finally, attach light fixture to mounting screws and secure, pop in bulbs, turn power back on, and voila: light!

Half Bath

Girls' Bathroom
I still need to patch and paint, of course (stupid painting). The tricky part was when I decided to do the master bathroom, and replace one big (eight-light) light bar with two three-light fixtures. Because there was only one junction box originally, I had to move it and install another one. Which also meant running wire through the wall. I basically followed all the steps I found in this blogger's post...mostly.

Because you see, when I decided where to put the lights, it just made sense that I would want to put them directly over the sinks, right? Well, I should have double checked that they would FIT right over the sink. Cuz...they didn't. Here's the process:

1. Remove Lights / Cut Giant Hole in Wall and Holes in Studs / Put New Wire in Wall

2. Put Junction Boxes in Place / Pull Wires Through / Start Patching Drywall
3. Finish Putting in Drywall Pieces


4. Tape Drywall Joints

5. Mud Drywall (Not Pictured: Sand a Ton and Get Dust Everywhere

6. Attach wires to light fixtures, turn back on breaker, screw in bulbs, switch on lights, realize left lights aren't working, take everything apart and put back together and then apart again, realize one of the wires was loose, reattach everything again, then sing hallelujah when all the lights come on

7. (Not Pictured) Cry when you realize you should have held up the light fixtures to the wall before you did all that work, so you would know in advance not to put them too close to the wall, since the window shades won't fit where they are

8. Take everything back apart, cut some more holes, move the lights over a few inches, go through the whole process again, and breathe a sigh of relief that it's all done